Pi Day gets me thinking about one thing – pies. It also gets me thinking about Farmers Markets that will be opening up again in the next month as we emerge from winter, and the fact that I always overbuy all of the berries every year. And then we end up with a freezer that is stocked full of fruit. So what I really need is a pie, but until I can carve the time to make one, we settled for this Clay Mini Pie art project instead.
What You Need
- Crayola Air-Dry Clay (or a white/neutral air-dry equivalent)
- A plastic lid (from yogurt, sour cream, or something approximately 6-8 inches)
- Clay tools
- Paper Plate
- Pan watercolors or cake tempera (for the plate)
- Metallic sharpies or markers (to embellish the plate)
- Acrylic or liquid tempera in crust and pie filling colors (for painting the finished piece)
- A round or flat medium-sized brush
Shaping the Pie
Start with a chunk of clay and roll the clay out until it is no thicker than an inch. Making clay thinner can be hard for kids, so using a clay rolling pin is the best way to get that clay flat.
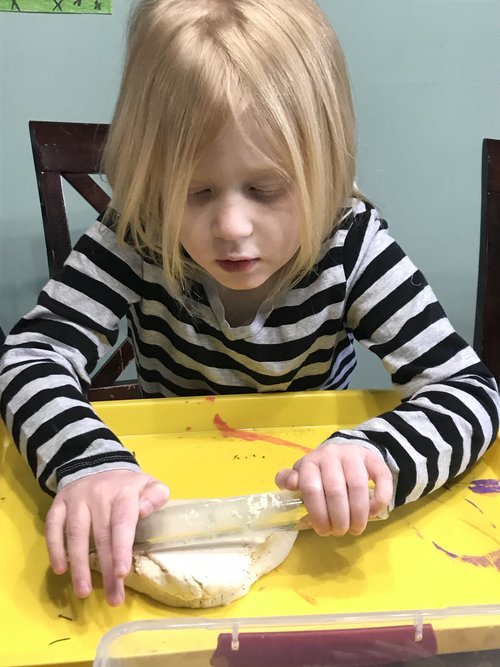
When the clay is flat and has been rolled out, take a plastic lid and press it into the clay. Take a clay knife and cut around the edges of the lid so you have a clay circle.
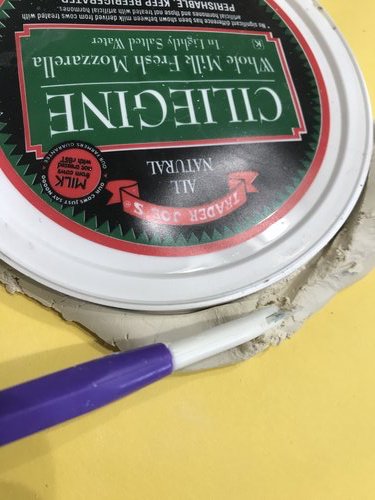
With the trimmed pieces, start rolling them into little balls to make blueberries or cherries. They don’t have to be perfect, since most of them will be covered with the the lattice.
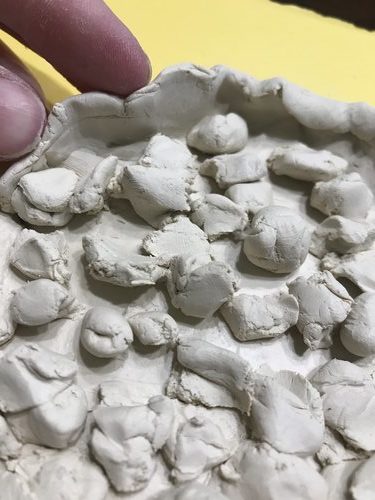
As you start to add the berries, start folding up the edges of the clay to make the crust. Kids will be able to see how many more berries they will need to make. Even though they won’t see many of the berries, kids still love being able to roll up the little balls, so it’s worth it.
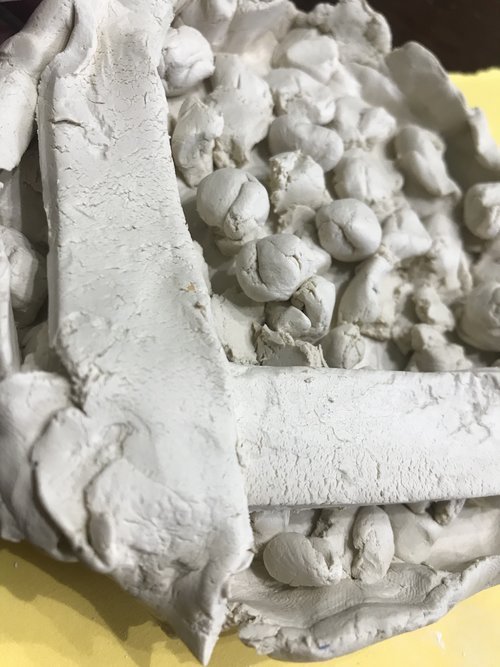
Roll out another piece of clay and cut it into a strip and lay it over the pie on one side going up-down. Repeat with another piece of clay, but place it over the previous strip going side to side. Continue to alternate building a lattice crust.
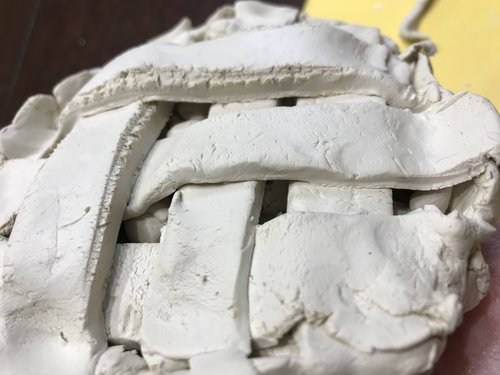
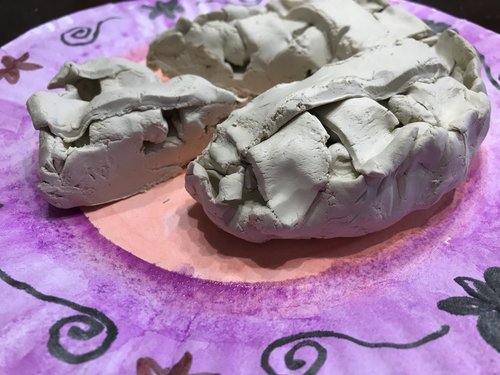
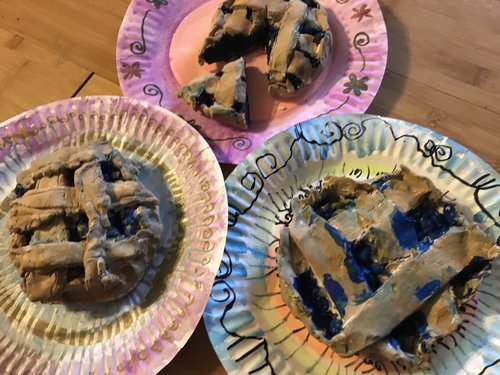
If kids want, they can cut a slice of pie out and let it dry instead of keeping the entire pie whole.
Making the Designer Plate
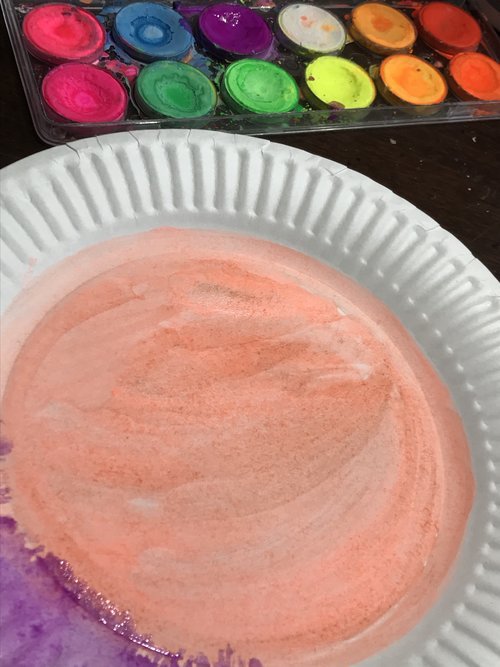
Use the pan watercolors or cake tempera to paint the plate. Kids can use metallic Sharpies or markers when the paint has dried to make designs. When the plate is dry, you can set the unpainted clay mini pie on it to dry for a couple of days.
Painting the Pie
Choose a color of acrylic or tempera paint for the filling, and one for the crust.
We chose blueberry pies and so I brought out dark blue and red and purple, but my Sparklettes insisted on a lighter blue for their blueberries.
For crust, brown, yellow, and white mixed together gives a wonderful tan color that makes it look like you just pulled it from the oven.
Start with the filling first. Let kids dip their paint brushes inside the holes with the pie filling color. It will get all over the crust, but that’s okay, because the crust will be painted last and kids can paint over it.
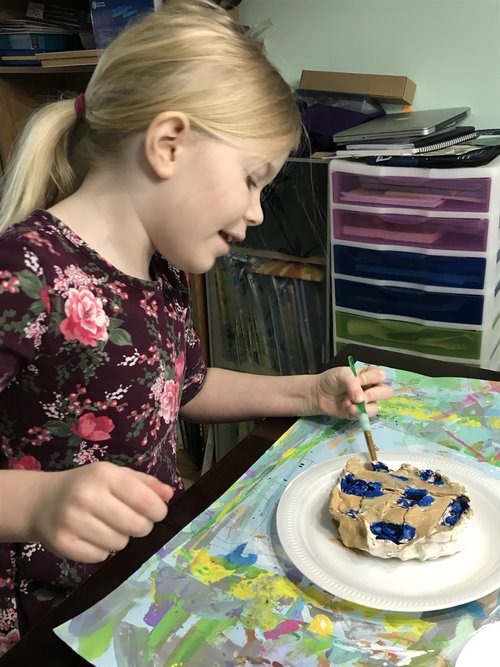
I made sure to note that pies are messy. So it’s okay for some of the filling to be showing on the crust, because goo happens. This helps them worry less about perfectionism.
When the paint dries, place the pie back onto the painted decorative plate and you’re done. Yum.
We would love it if you’d share!
Don’t forget to tag us at @soulsparklettes on social media if you make this pie art project with your kids or students – we love to see what you create!
Join the Glitterbombers Membership!
This is only one of the many diverse art lessons in the Glitterbombers Membership. Hundreds more art projects, videos, and resources at your fingertips for whatever you’re studying, or whatever art concept you’re ready to teach. Head here to hop on the waitlist and find out when we open next!
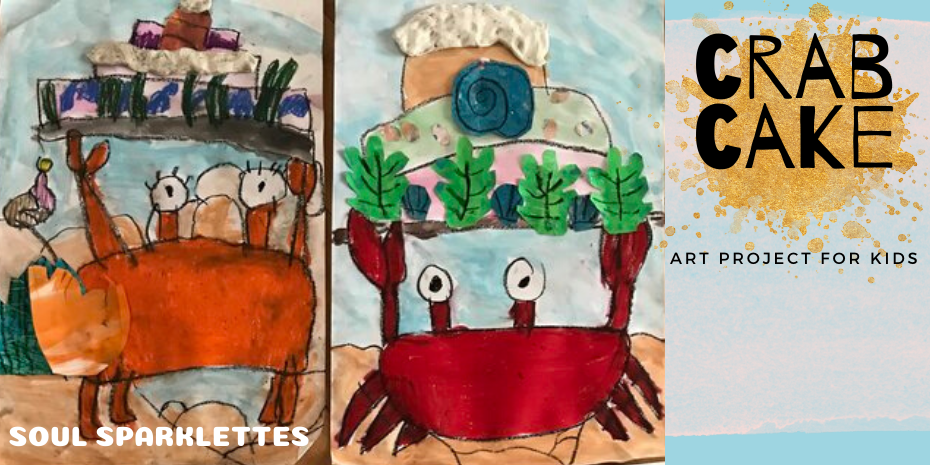
If you love this clay mini pie project, you might love this under the sea celebration: