A Watercolor Ghost Project Perfect for Any Time of Year
There’s just something about the recent slew of picture books coming out, all with an adorable ghost on the cover with rosy cheeks. I had to create something that paired perfectly with them, and that could be done with all ages.
Though ghosts are typically drawn as white, I thought it would be a fun thing to experiment with colors. Would one color combo look more ghostly than the other?
And since color combinations are endless, I almost couldn’t stop myself once I started.
Using a simple Sharpie, watercolors, and a handy pair of scissors, you too can create this adorable ghost art project.
And if your kids think ghosts look a little differently, then let them draw their own!
These ghosts were created by a 3rd grader and are investigating a donut theft!
A Little Ghost Art Project Video
What you'll need:
9×12 white sulphite or mixed-media paper
9×12 black sulphite paper
Black Sharpie
Silver Sharpie or construction paper crayons (for background)
Watercolors
Paintbrush and cup of water
Scissors
Glue stick
Watercolor Ghost Art Project Instructions
Choose how many ghosts you’re drawing and fold the paper accordingly. The easiest is 4 ghosts, folding in half one way and in half again.
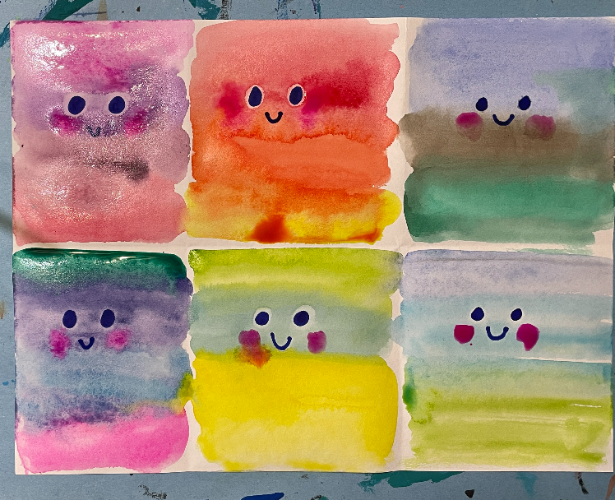
Use a black, violet, or dark blue Sharpie to draw a simple and kawaii face in the upper part of each section. For an easy face, draw two filled in circles and a little tiny smile.
Choose 2-4 colors per ghost and paint stripes of color going across the face from left to right.
Experiment with color and watch what the watercolors do. Did you get the colors you expected?
Drop a small amount of pink or red where the cheeks would be. The watercolor will spread out a bit, and that’s okay!
You can use a piece of paper towel to dab at the ghosts to dry the paper faster, but wait for the paper to dry before continuing.
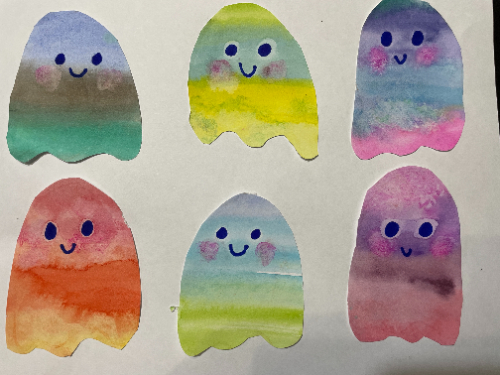
Flip the paper over and draw the ghosts.
Start at the bottom left of each ghost, draw a rainbow line up and over the eyes, and back down. Then join the ends together with a wavy line.
Cut out and trim the ghosts to the way you’d like.
Student may also choose to draw ghosts the way they’d like, like in these elemental ghosts, drawn by a 6th grader.
Glue down onto the black paper and use construction paper crayons or a silver Sharpie to decorate the background, including adding a border.
Ready to get a little cute and spooky?
Click the banner below to download the FREE lesson plan.
We would love it if you’d share!
Don’t forget to tag us at @soulsparklettes on social media if you do this ghosty art project with your kids or students – we love to see what you create!
Join the Glitterbombers Membership!
This is an example of the fun we have inside the Glitterbombers Membership. Hundreds more art projects, videos, and resources at your fingertips for whatever you’re studying, or whatever art concept you’re ready to teach. Head here to hop on the waitlist and find out when we open next!


Wonderful lesson thank you :) Erika Oldershaw
We’re so thrilled you love it as much as we do! :D