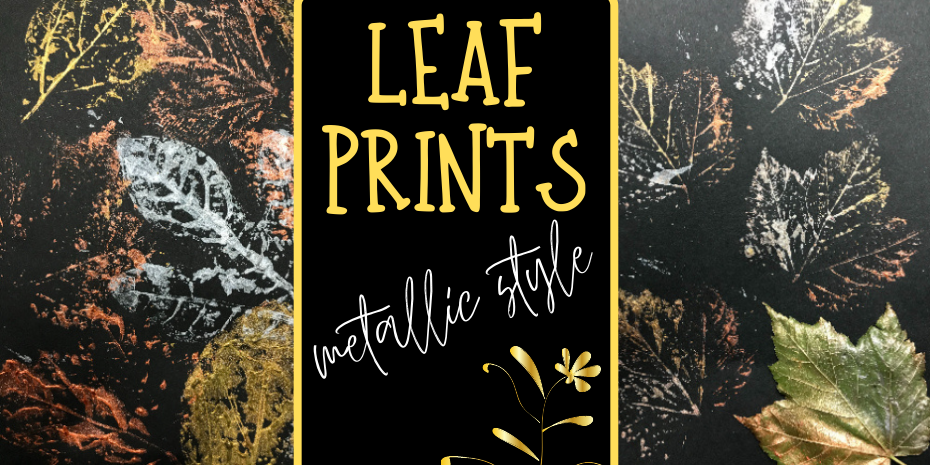
There is nothing like walking among the rainbow trees that signify autumn. I’ve never been able to go on a walk this time of year and not bend down and pick up a bunch, arranging them in rainbow order in my hand, always bemoaning the lack of blue. I always bring them home, and then I’m never quite sure what to do with them. I was confident that leaf printing with kids needed an upgrade this year other than the standard prints done in red, yellow, and orange. So I busted out the metallic liquid tempera.
Tempera paint with some bling
When doing leaf prints with kids, one of the best types of paint to use is liquid tempera. It’s thick enough to cover, makes an even print, and it will wash out of clothes (whereas acrylic can be dangerous to use with a toddler around).
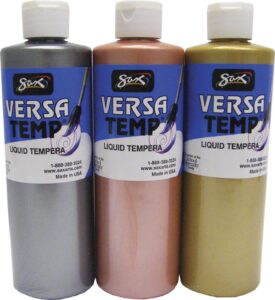
SAX Versa Temp makes a beautiful, thick tempera paint that goes a very, very long way. Check it out here. I guarantee you’ll find more uses for this gorgeous paint!
I knew that this paint would be just what we needed. We squirted the three colors into our palette – and I got out black paper because i wanted the shimmer to pop.
Painting with a pop
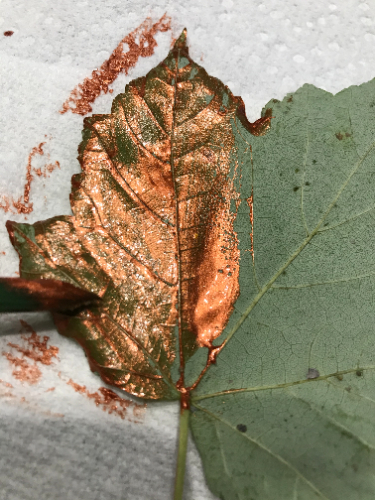
Often leaf printing is done by sticking the leaf or leaf cut out into the paint. This method uses a paintbrush to ensure that the paint gets into the vein nooks and crannies as well as covers all of the veins themselves.
We flipped over a leaf and chose copper and got to work painting the leaf and getting that paint over the entire leaf.
At first we worked with one color to make prints, but then we realized that the leaved looked beautiful with multiple colors, so we chose copper for one third, silver for one third, and gold for the remaining third.
We didn’t rinse our brush and found that the continuous color dipping made for some beautiful, shimmery effects.
My oldest was fond of a lot of paint on the leaf, so her prints were bold and more silhouette-like. My youngest spread her paint thin and therefore the veins showed up better.
Ready to roll
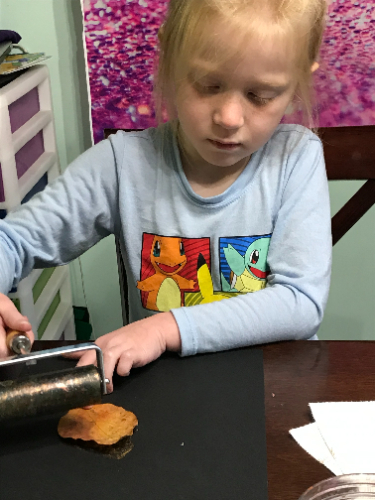
When the paint was on the leaf, we inverted it onto a piece of black paper. But we didn’t press down. We used a different method: a brayer.
A brayer is a roller, often used in printmaking, and it’s not a common household item. But a rolling pin from play-doh or clay works just as well. This helps get the even coverage onto the paper, where sometimes little hands only press a part of the leaf down and the leaf print ends up looking more like a leaf piece.
Once we made a print, it was a little hard to stop. Varying the leaves and layering them made for one effect, using a single leaf made another. Our favorite leaves to use are maple and sycamore – and sycamore look a bit like ghosts, perfect for this time of year.
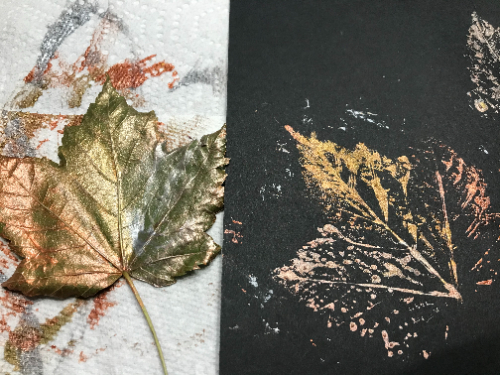
The one thing I did wish for, is a way to easily preserve the look of the painted leaves themselves. Look at this picture. I’m not sure what’s more stunning – the print, or the leaf which looks like it has been gilded. Can you imagine a shimmering fall leaf bookmark?


We would love it if you’d share!
Don’t forget to tag us at @soulsparklettes on social media if you do this metallic art project with your kids or students – we love to see what you create!
Join the Glitterbombers Membership!
This is an example of the fun we have inside the Glitterbombers Membership. Hundreds more art projects, videos, and resources at your fingertips for whatever you’re studying, or whatever art concept you’re ready to teach. Head here to hop on the waitlist and find out when we open next!
These are beautiful! I will try them this week with my kids. We’ve been dipping leaves in wax. I wonder what would happen if you dipped a painted leaf? Would the paint melt off? Or would it preserve it?
Hi Lise! Thank you so much! As for dipping painted leaves in wax, I think it would depend on the paint and how dry they are. I think if the paint was dry, you would have no problem making metallic wax leaves (and goodness – how beautiful!)
What quality of construction paper did you use? The ones we get at school are so thin
One of my favorite is Pacon Tru Ray sulphite. Sometimes they don’t call it sulphite but “heavyweight construction paper” and the quality is SO much better than traditional construction paper (I’ve saved the regular ol’ stuff for collage!)