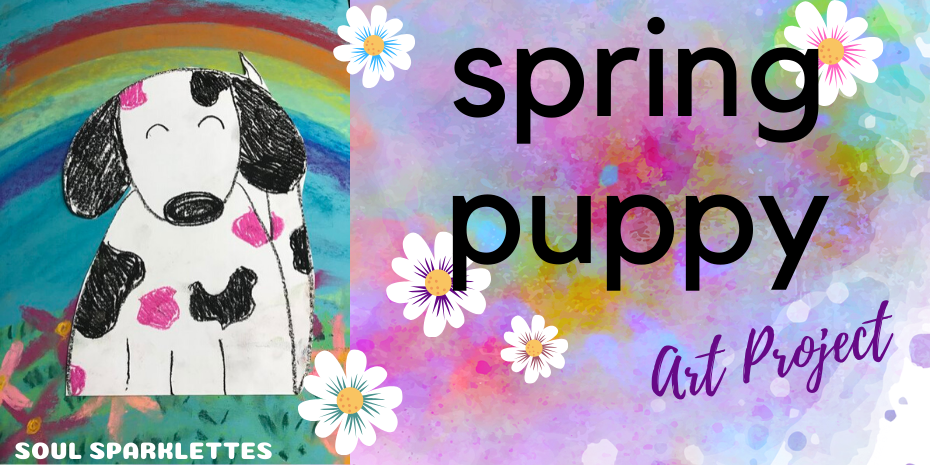
When I recently asked kids what kind of lesson they would love, I heard two things: dogs and spring. And who couldn’t use more smiling?
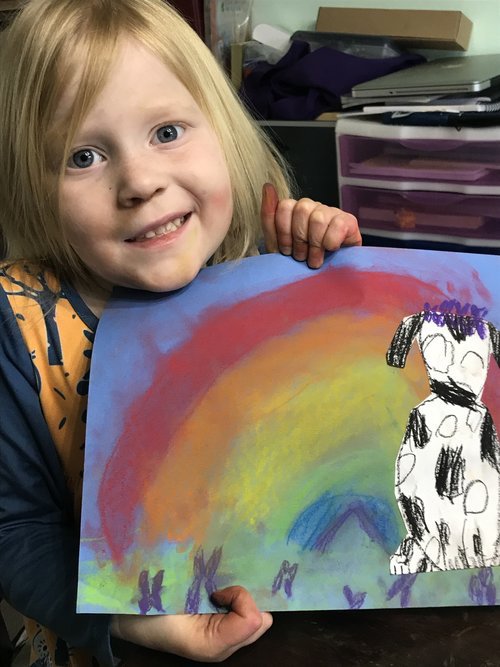
I decided a smiling dog under a rainbow, surrounded by flowers, is just the thing. So I created this Spring Puppy Art Project, with the hopes that it would bring a smile to kids’ faces, and to yours.
What You Need
- Black oil pastel and 1-2 colors of another oil pastel (for the spots)
- Chalk pastels
- 9×12 sheet of white sulphite paper
- 12×18 sheet of blue sulphite paper (or 9×12 if you want a smaller project)
- Scissors
- Glue stick or white school glue
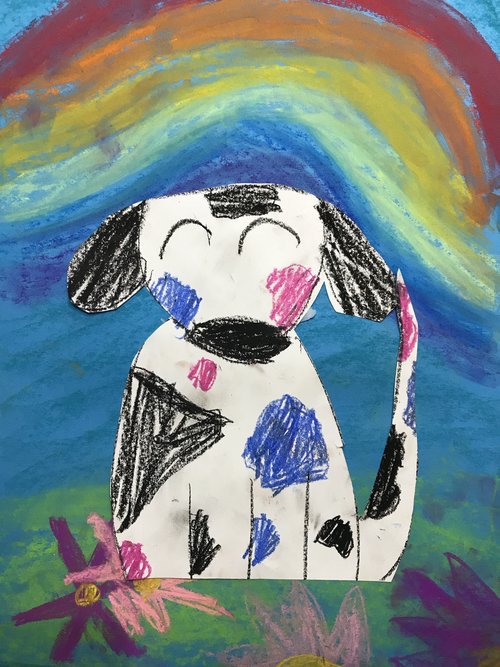
Drawing the Dog
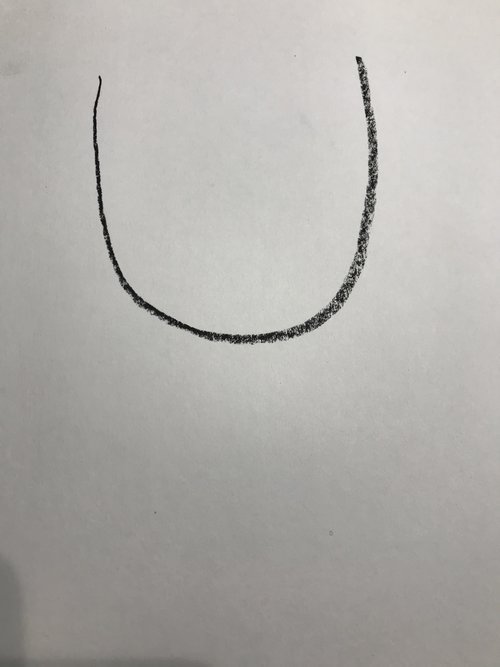
In the middle of a white piece of paper, draw a large U-shape. If you are using 12×18 paper for the background, have your white paper vertically. If you are using 9×12 paper for the background, turn your paper horizontally.
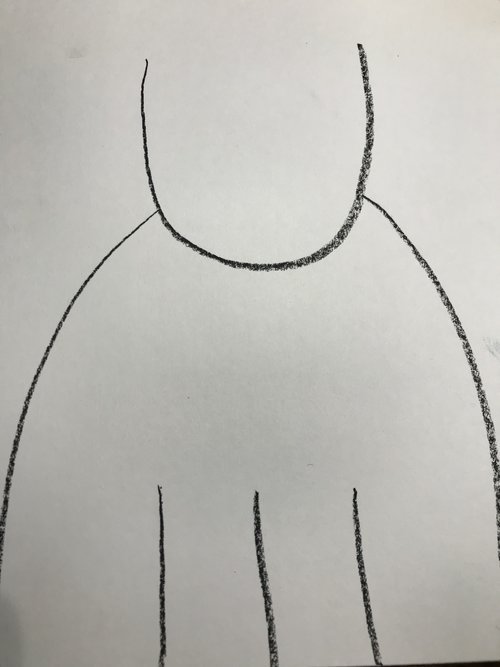
Draw two curved lines from either side of the U-shape, all the way down to the bottom of the paper. Add three shorter lines in the middle of the body for the legs.
Draw a slightly rounded rainbow line for the top of the head. Add two floppy ears using curved lines to either side of the face. Add two shorter rainbow lines for the eyes, and an oval at the bottom of the U-shape for the large nose. Then draw a tail to one side of the dog.
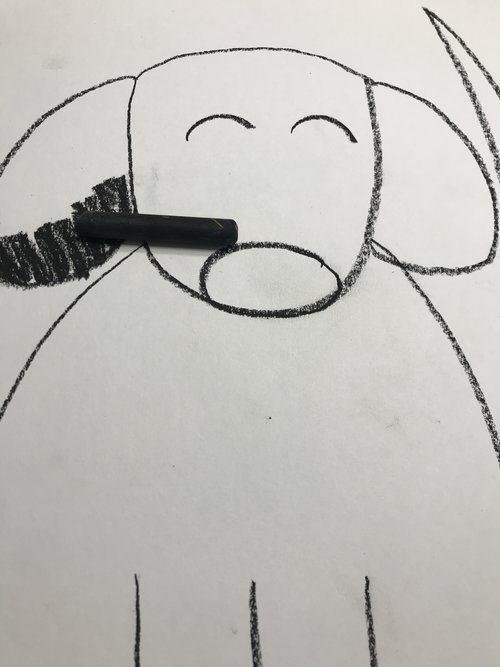
Use the black oil pastel to color in the ears, the nose, and to add a few spots to the dog and color them in.
Note: Be careful not to add a spot around the eye if you did the eyes like above, or kids will soon realize that they have to color in the eye completely.
Now pick one or two colors and add some additional spots. Choose your favorites! If the child wants to stick with black, that’s perfectly okay.
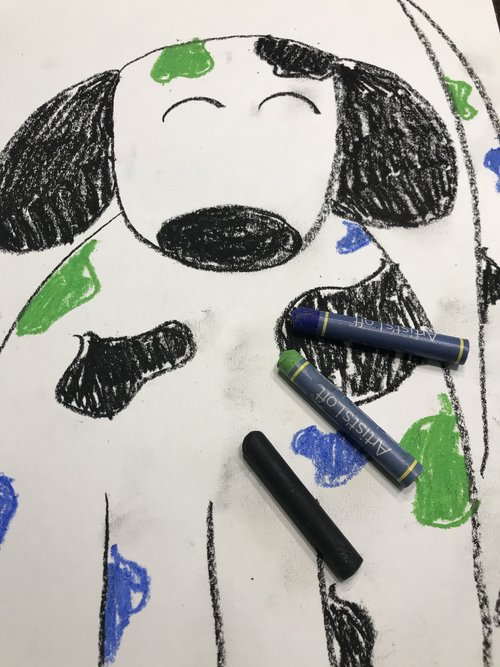
Cut the dog out and set it aside and it’s time to create the background.
Under the Rainbow
If using the 12×18 paper, place it vertically, and if using the smaller paper, you can turn it either way.
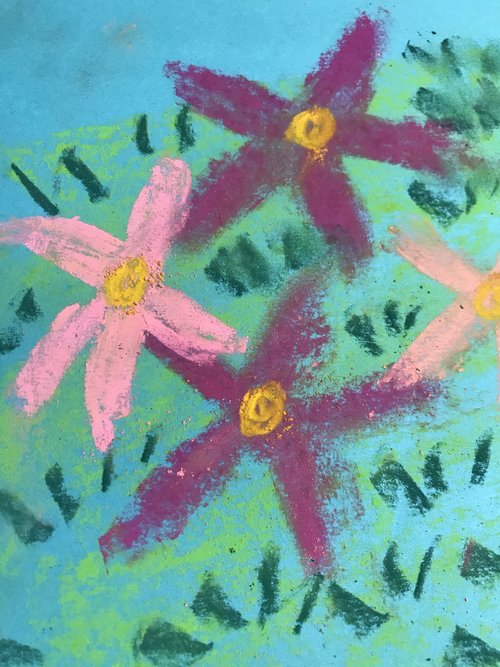
Choose a green chalk pastel and draw a horizon line about a hand’s height from the bottom of the page and color in the grass.
Starting near the top, place a red chalk pastel on its side and draw a slightly curved rainbow line from one side of the paper to the other. Repeat with the other colors of the rainbow. Smooth each color out, one at a time, with one finger.

Use a darker green chalk pastel to add short little lines for the grass. Smooth out with one finger.
Use a bright color to draw 5 petals in a star shape for your first flower in the grass. Continue to make 5 or 6 flowers near the edges of the page (the dog will go in the middle). Use a yellow or orange for the center.
Glue the dog so that its feet are either at the bottom of the page, or in the center of the grass.
If you make a Spring Pup, let me know how it goes in the comments below – I’d love to hear from you!
We would love it if you’d share!
Don’t forget to tag us at @soulsparklettes on social media if you make this spring puppy art project with your kids or students – we love to see what you create!
Join the Glitterbombers Membership!
This is only one of the many diverse art lessons in the Glitterbombers Membership. Hundreds more art projects, videos, and resources at your fingertips for whatever you’re studying, or whatever art concept you’re ready to teach. Head here to hop on the waitlist and find out when we open next!
If you love this Spring Puppy Art Project, you’ll love this bunny project perfect for the season: